Visuals are incredible aids to our memory. In a memory study referenced in the book Brain Rules, people only remembered 10% of the information they heard three days prior. But by adding a photo to that information, those same people remembered 65% of the information.
Nowhere is the importance of visuals more apparent than the Web. Images set the mood of a website and give visitors clues about what they will find on that page. Due to the importance of visuals, you’ll want to use them well and make sure they load quickly, creating the best possible user experience for your visitors. And the way to do this is to optimize.
Page load speed—because time is of the essence
One major reason to optimize your images is that images with large file sizes slow down a website. That’s because large images need to be completely loaded before the whole webpage will be visible to the user. This process can happen in a blink of an eye or last for several painful minutes (if your visitors even wait that long).
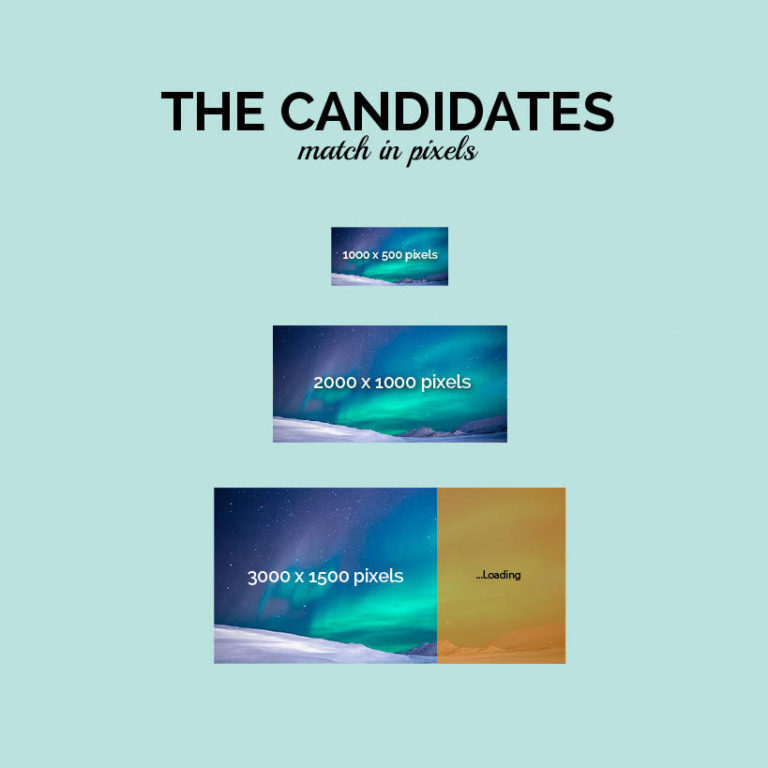
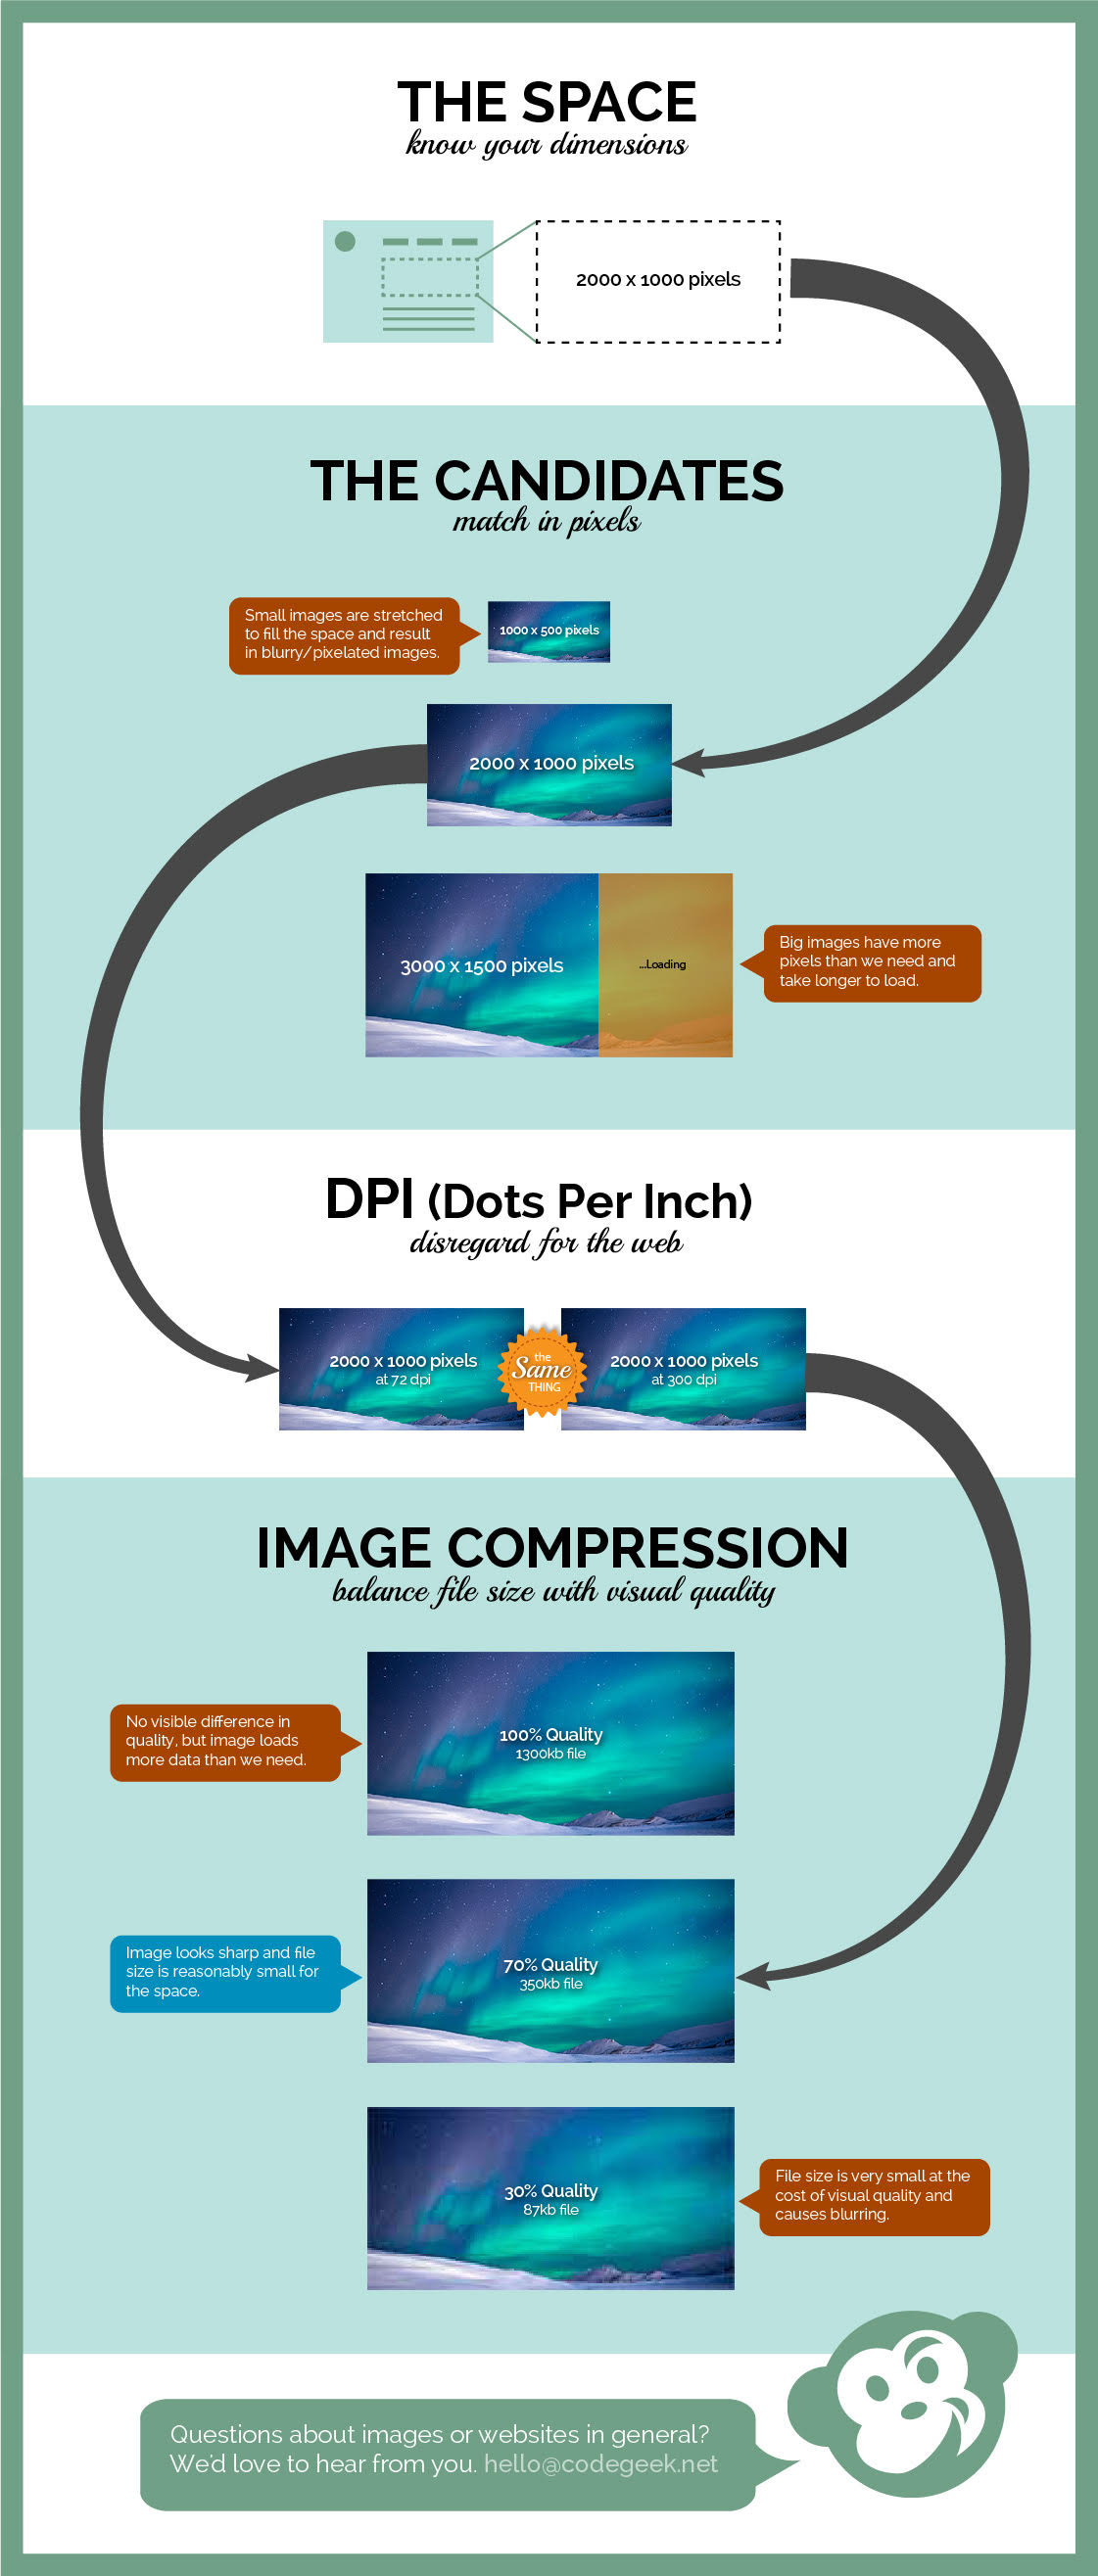
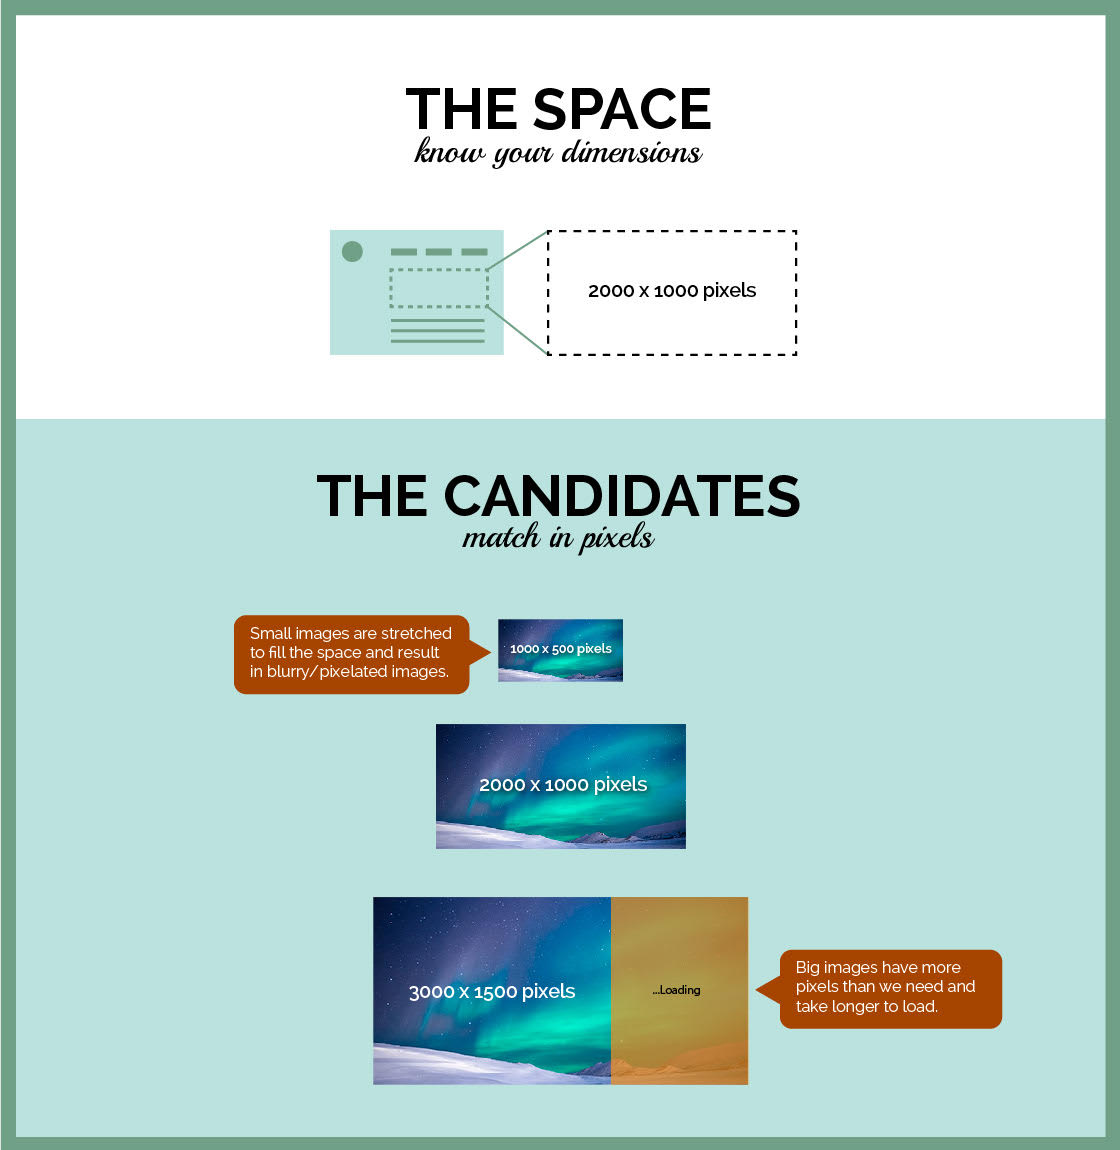
When we talk about page load speeds, seconds count! According to this study, visitors will wait 5 seconds or less for a site to load on their mobile devices—and it’s even fewer for desktop users. If your images slow down your site’s loading speed, you could lose customers. To optimize your images, you want to display them at the correct dimensions (height and width) at the best quality they can be (high resolution) while keeping the file size as small as possible. Check out the graphic to explain this more in depth.
Part of this is picking the right image file type. Another part is done through image compression. Whether you handle your own image optimization or pay someone else to do it, you need to know what image optimization means for your website.
Brief primer on image types
There are several image types you will commonly hear developers and designers talk about. Some of these options support transparency, which means that the background of the image allows the color of the page behind it to show through. This is especially useful in logos where you want the image background to be the same color as that of the website header (as you’ll see in our PNG example below).
JPEGs
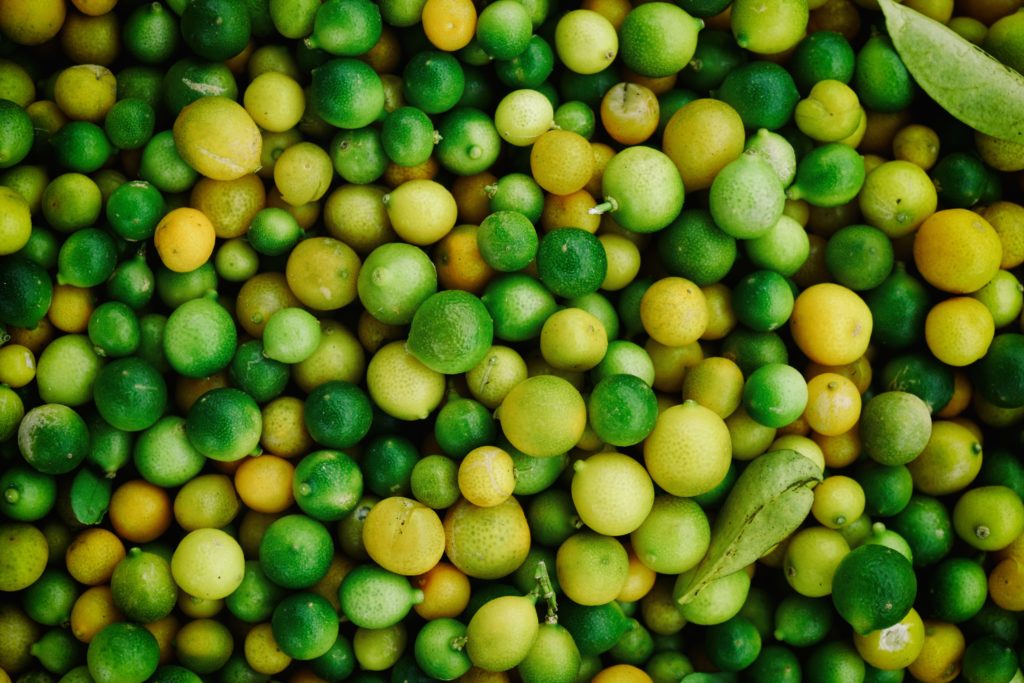
JPEGs are the most common photo file type on the web. They don’t support transparency, but they are great for images that have lots of color varieties (color range) or when the colors progress from light to dark (color gradient).

PNGs
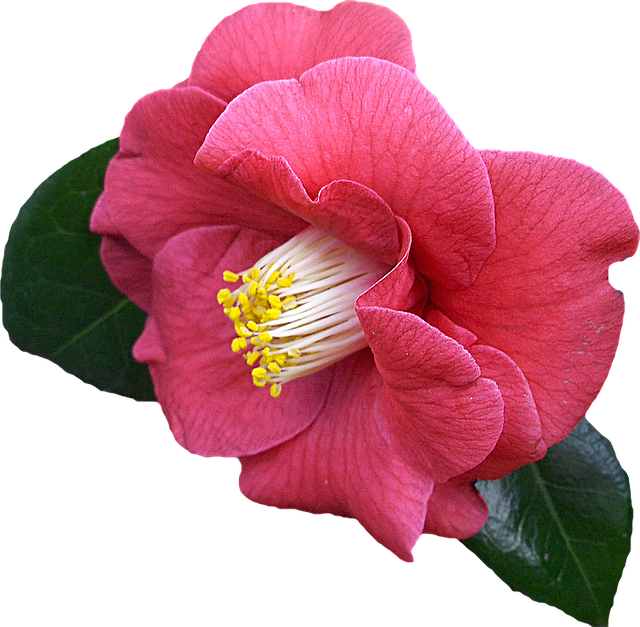
These image types result in amazing photo quality that are sharp and can have intense colors. PNGs do allow for transparency, which is the major difference between this image type and JPEGs. You’ll notice the flower image below shows the background of our site because its background is transparent.
Generally, JPG file format is better for photo images for file size unless transparency is needed. PNG format works well for images with lots of solid colors and transparency, such as for logos.
GIFs
Some people pronounce it with a hard “g,” others say it like “jifs.” Tomato, tomahto! Say it how you will—it’s still the same thing. You’ll often hear GIFs mentioned in reference to animated GIFs, but they also can be static images. GIFs support transparency, but have limited color ranges. Because of their limited color ranges, GIFs can work well for graphics with a small number of colors like logos and illustrations, but not photographs.
Finding out the file size and dimensions of an image
What you need to do first in order to optimize your image is to know 1) what file size and dimensions (height and width) your image has and 2) what dimensions your image needs to be for the specific spot on your site where it will be placed. Your developer can give you the information about what dimensions your images need to be. An image that is going into your homepage slideshow will have drastically different dimensions than one that is used in a blog post thumbnail.
Depending on whether you work on a Mac or a PC, you can easily find out the file size and dimensions of your images. On a Mac, right click on the photo in the Finder and select “Get Info.” Under “More Info,” you’ll see the image dimensions (in pixels) and file size (in KB or MB).
On a PC, right click on the image in the file folder where it’s saved. Choose “Properties” and click the “Details” tab. Scroll down to the Image section to get the image dimensions and the File section to see the file size.
A few words about Retina displays
“Retina” display is actually a term used by Apple to market its high pixel density displays. And it’s no wonder why—Retina display is a lot easier to say (and type) than “high pixel density display.” The term Retina display, according to TechRadar, is used regularly to describe monitors that when viewed normally (meaning the viewing distance that’s normal for that device) have sufficient pixel density that essentially matches the pixel density of your physical retina and you can’t make out any one pixel. This results in your visitors seeing your website and its images more clearly, but only if you plan for it.
At CodeGeek, we prepare for our websites to be viewed on devices with Retina displays by doubling the image’s dimensions for the space it will live in. For example, if a slideshow image should have dimensions of 1550 x 600 pixels, we upload an image that is 3100 x 1200 pixels. This isn’t a catch-all solution for every image on the site—we’ve also used less than double the dimensions before so feel free to play around with this to figure out what works best on your site.
Resizing an image
Nowadays, your camera and smartphone generate images with very large dimensions and file sizes. But you probably shouldn’t use such large images as they will drag down the load speed of your site’s pages. To get an image down to the dimensions you need, you will need to resize it. You can resize an image easily either on the web or on your computer. If you’re resizing on your computer, open up the image in Preview (on Mac) or Paint (on PC).
In Preview, click on “Tools” and then “Adjust Size.” A window will open that will show you the image dimensions. It may show the width and height in inches, but you can change that by selecting pixels in the dropdown menu to the right. Put in the correct dimensions and click OK. Save the image and you’re ready to go.
Here’s a short video to demonstrate this (no audio):
In Paint, open the image. On the Home tab, click “Resize” in the Image group. Select the “Maintain aspect ratio” checkbox so the image doesn’t get distorted. Then click “Pixels” and enter the new width or height. The other will adjust automatically. Click “OK.” Save it and you’re done.
Here’s another short video to demonstrate this (no audio):
If you’re resizing an image on the web, you can try the free online tool Pixlr. if you’d like to crop, resize, or have more editing options. We created a handy guide on how to use Pixlr to resize and crop, too.
Resizing will help you get an image that has the correct dimensions for the space in which you’re going to put it. And then you’ll be ready for the last step of image optimization, which is image compression.
How to compress an image
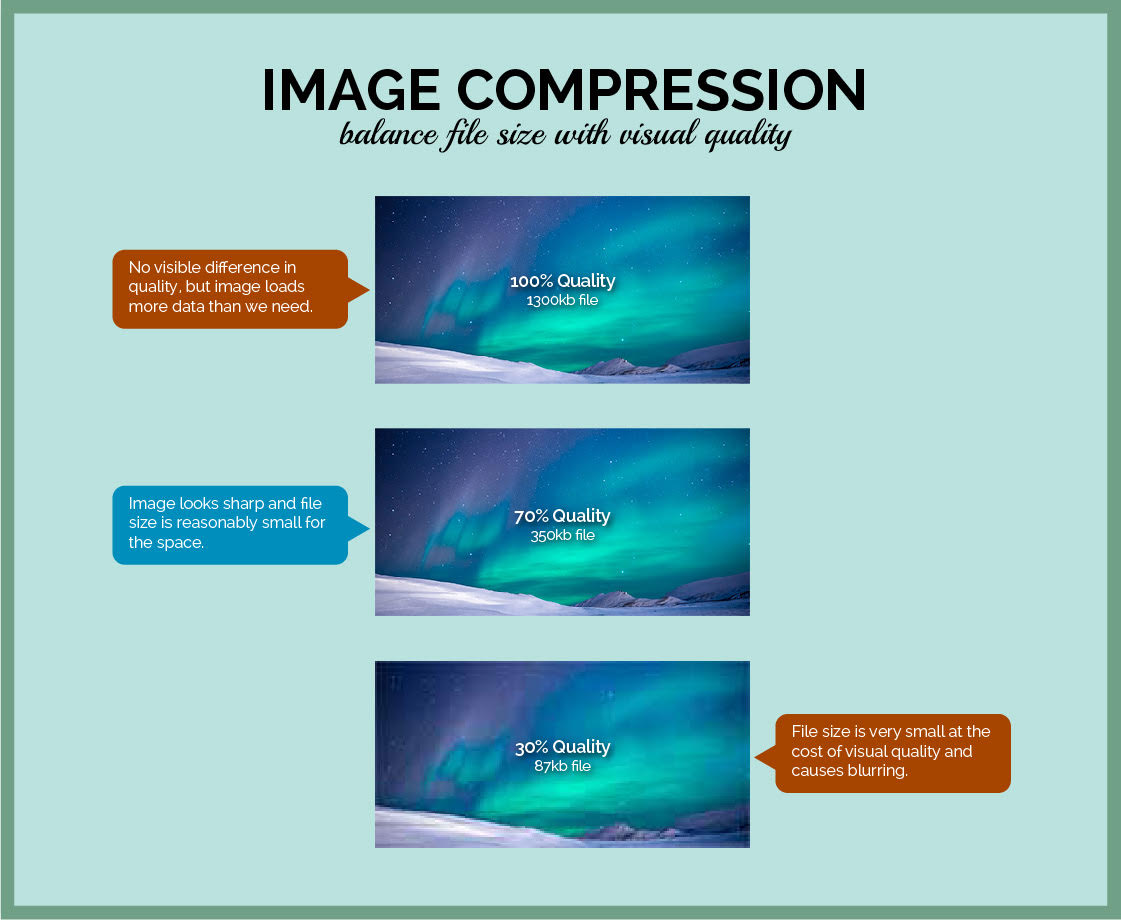
Image compression is an important step in image optimization because it can reduce the file size by removing data in such a way that we don’t notice it is gone. A visitor won’t notice that the data is gone, but your site will load much faster.
To compress images, you can use web-based solutions like Pixlr or desktop software (such as the Preview application on a Mac) to do it. Those tools will allow you to manually compress images one by one. If your website has a lot of images, a better solution is TinyPNG, a tool that integrates with your WordPress website and automatically compresses PNGs and JPEGs for you. No manual compression required. You should check with your developers to confirm that they do not have a plugin already in place that compresses images. Otherwise, you might compress the image multiple times, which often results in a blurry or pixelated image because it’s over-compressed.
If you use Photoshop, adjusting the quality settings will means you’re adjusting the compression of the image. Before you start compressing images, make sure you’re compressing a copy of the original image and save the original in a safe place so you can start anew if you need to.
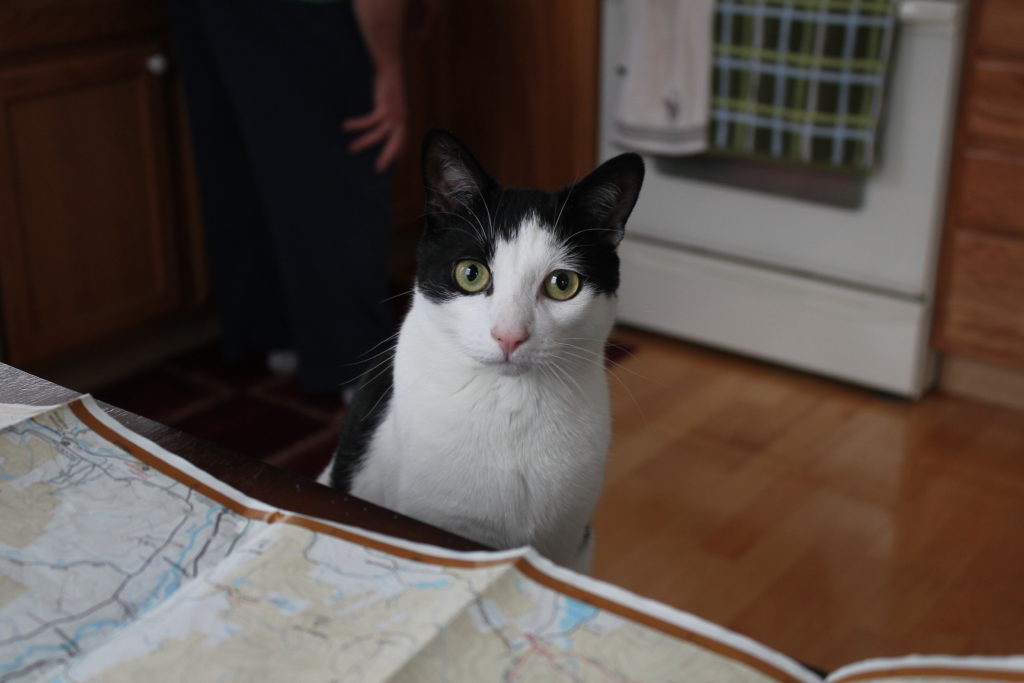

We compressed Remy the Cat with TinyPNG (have no fear, no cats were harmed in this example). You may notice some pixelation in the floor and oven behind him, but it’s not much for having reduced the image size 77%, which greatly improves the speed at which this image loads. For other examples, check out this page.
No matter how you compress your image, always check out the results to make sure it still looks okay. Image compression isn’t fool-proof and you may end up with an image that’s pixelated if you don’t check it after compression.
With these image optimization and compression tips, you should be able to keep your site loading quickly, creating great experiences for your users on your site.
—
Big thanks to Jason Robie at CodeGeek for the image compression lunch n’ learn that spawned this blog post and Chris Lenfert for the graphics!
Image credits: Freerange (lemons), Pikwizard (sunset), NicePNG (flower), CodeGeek (infographics)