
PayPal Buttons for “Simple” E-commerce
Whether you’re a small business owner, a non-profit, or somewhere in between, chances are you have a website.
And chances are equally great that you’ve thought about selling something on that website.
You may have looked into setting up e-commerce, but for one reason or another, you threw in the towel. And yet, the question still remains: “Shouldn’t there be a simple way to sell this awesome thing I made?”
Depending on what you’re selling, the answer could be a resounding “YES!”
Who Is A Match for PayPal Buttons?
When clients come to us and say there’s “just one thing” they want to sell, we agree that there is an easier way: Meet PayPal buttons.
This feature has actually been around for a good long while, and we’ve found it to be a great solution for situations where:
- the product truly is “simple” (there’s one version, there’s one price, etc.)
- clients are okay with users paying via PayPal
- setting up PayPal doesn’t bust your budget
What Is The User’s Experience With PayPal Buttons?
With PayPal’s prolific and solid reputation as an online merchant, many consumers are very comfortable with using PayPal to make their purchases.
The general user experience becomes:
→ The user is on your website and they click “Buy Now.”
→ → They’re taken to the PayPal website to complete their purchase.
→ → → They’re taken back to your website.
Pro Tip: Keep in mind that PayPal charges a transaction fee plus a fixed fee based on the currency. (You can get the latest on PayPal’s pricing by visiting their website, and this fee is usually comparable with most online merchants.)
How to Set Up PayPal Buttons
Step 1: Set Up a PayPal Business Account
- You will need to set up a PayPal Business Account, including adding your Employer ID number and connecting a bank account. (This is so PayPal can both verify you’re legit and provide a way for them to transfer funds received to you.)
- This is also the step where you’ll set up other business-y things, including: what your merchant email should be (if customers have questions about their order), your company logo and your company name.
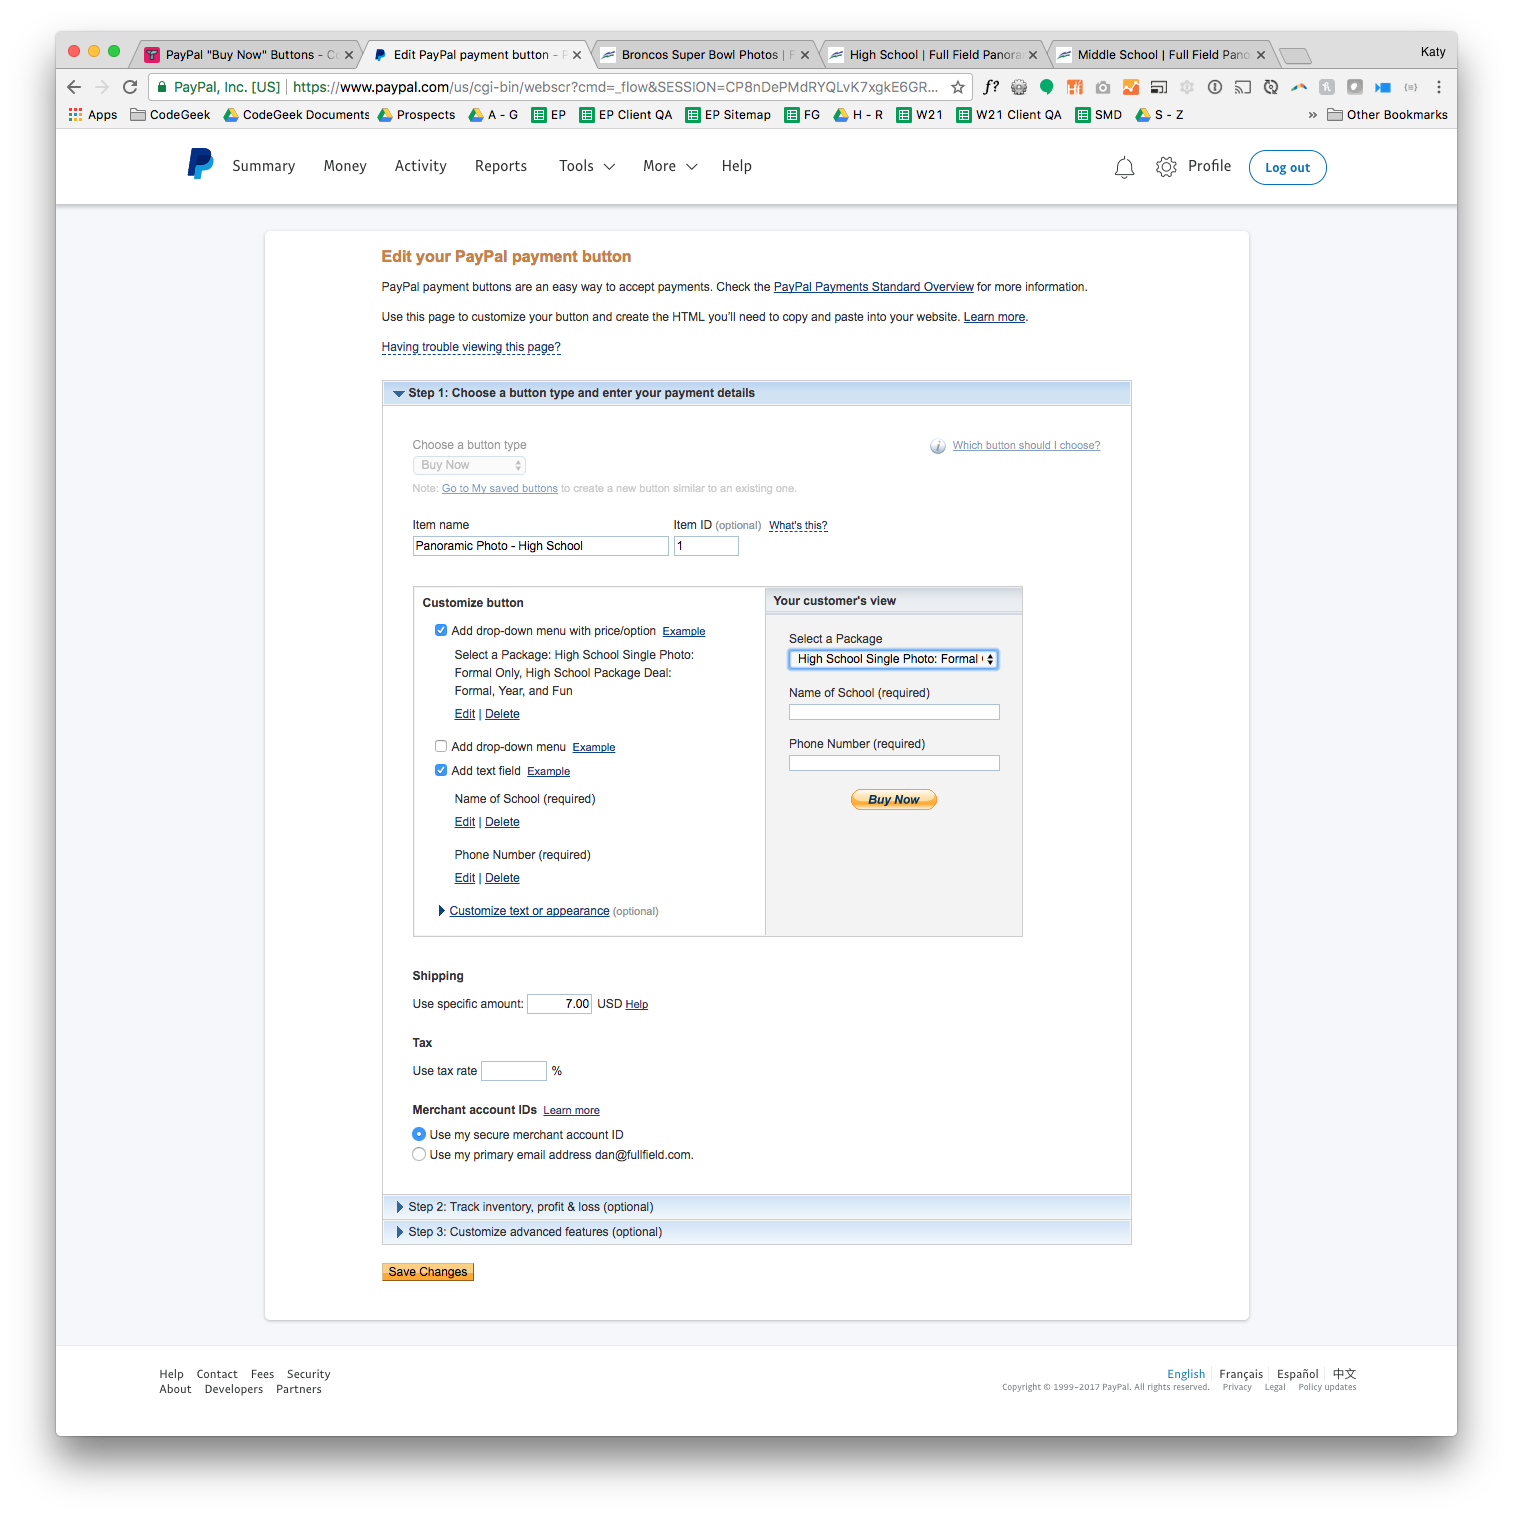
Step 2: Create a PayPal Button
- While logged into your PayPal Business Account, go to the PayPal Buttons page, or navigate there by going to Tools > All Tools > PayPal buttons. For this example, let’s make a “Buy Now” button.
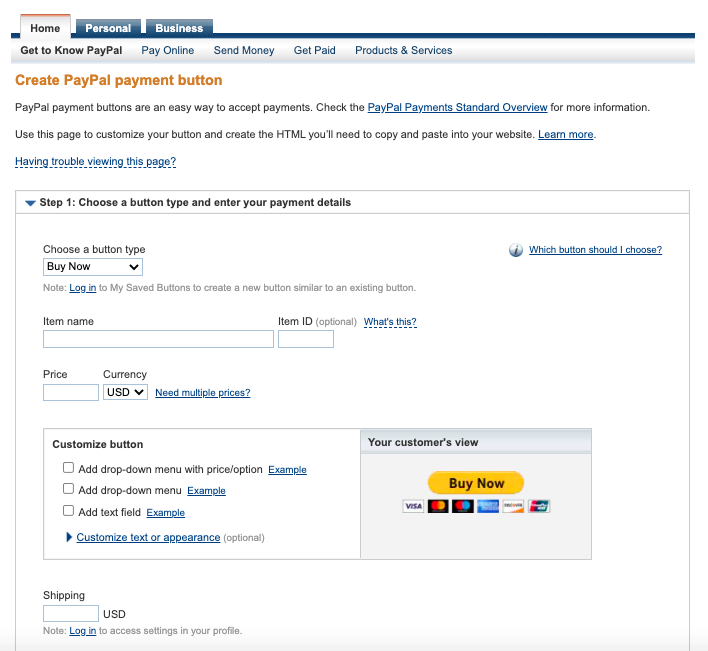
- Work through the steps to create a button.
- You will be prompted for some basic information such as: product name, price, tax and shipping.
- What’s key is that everything you put in here is basically static (meaning it won’t change). We recommend doing yourself a favor by keeping it simple. You can always come back later to make changes.
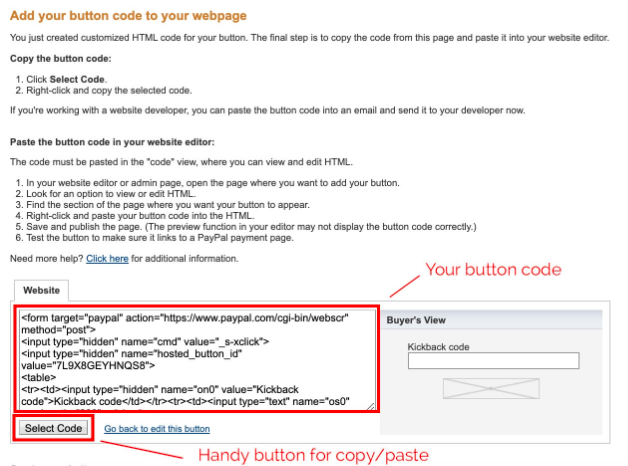
- Once your button is created, it will generate the button code you can use on your website.
- There’s no need for you to understand the code.
- Just know the code creates your button and you’ll need it for copying and pasting later.
Pro Tip: If you’ve created a button in the past, in the top right-hand corner of the PayPal buttons page is a link to “View your saved buttons.”
Step 3: Install the Button
- On your website, decide where you want your button to appear.
- Again, keep it simple—don’t get your heart set on it looking a certain way or showing up in a specific place.
- Generally speaking, having the button on its own line in its own space is going to serve you very well.
- Add your button. (Potential tricky-ness ahead!)
- If you are using a Content Management System (CMS) such as WordPress, you’ll want to find your CMS’ button that lets you add things as raw code.
- If you are editing the actual code, we’ll assume you know enough to be dangerous. The key is once you are editing in the code view, you will need to copy and paste your button code here and then switch back to the regular editing mode you were in before.
- You should now see a PayPal button in your content!
Pro Tip: To find the button that lets you edit raw code, hover your mouse over all the buttons in the editing menu until you find a tooltip that says “Edit as HTML” or “Edit as code” or similar.
Step 4: Test Your Button
Of course, because we like to practice safe coding, we recommend you do a few tests to make sure your button is working correctly.
We recommend the following tests:
- Try submitting an empty form.
- Does it give you an error?
- Desired result: As long as you do get an error and the message makes sense, this is good.
- Try submitting bad information.
- Examples might be entering a higher quantity than you have in stock or putting in or putting in a zip code with too many digits.
- You can also try putting in values that don’t make sense.
- Desired result: Again, if you get errors that make sense, this is good.
- Try submitting good data.
- When you put in good data, does the button take you to a PayPal Checkout form with the right product, shipping and tax filled out like you filled out for your button?
- Does the PayPal payment page have all the payment options you’d expect? (You’re looking for “Pay with PayPal, a credit card, PayPal credit,” etc.)
- When you submit your payment, do you get taken back to your website?
- Do you have an order confirmation in your email inbox, both as the seller and as the customer?
- Desired result: If the answer is “yes,” this is good! (We recommend a happy dance.)
Step 5: Start Selling!
Once your button is working, you can now monitor your sales. Woo-hoo!
- From this point, essentially everything is managed from PayPal. You’ll receive notifications when new orders are in, payments are received, etc.
- It’s also within PayPal where you’ll manually transfer funds from your business account to your preferred bank.
Pro Tip: It’s important to remember that If you make changes to your button in PayPal, you will likely need to redo the installation and test steps above to update your website.
Need Help With Your PayPal Button?
PayPal has fantastic documentation and support, so we recommend making a note of their Help page and resources.
And of course, CodeGeek is always happy to answer any questions you have. Give the Geeks a call and we’ll help get your e-commerce up and running.