
May 25 was a big day for user privacy. That’s the day that the General Data Protection Regulation (GDPR) went into effect in the European Union (EU). Even though it may feel like GDPR is laser-focused on companies located in or targeting customers in the EU, none of us are exempt.
Whether you’re a business titan with a global market or a local mom-and-pop shop, we each have a responsibility to our users and the data we collect. Read on to see how you can start taking action.
GDPR – What Is It?
The General Data Protection Regulation (GDPR) is a regulation passed by the European Union (EU) in 2017, which took effect on May 25, 2018. The GDPR is an extension of the Data Protection Directive that includes additional provisions for privacy and rights surrounding data collected and maintained by businesses. All companies doing business in EU countries or with people who are in the EU are required to comply with GDPR, even if that business is located outside of the EU.
Under GDPR, users have the right to:
- consent
- be forgotten
- be notified of data breaches
- data access and portability
Pro tip: If you can say “yes” to any of these questions, then GDPR will be looking at you first:
- Do you have a physical location in the EU?
- Do you directly target customers in the EU?
- Does your business target a global customer?
- Does your business target anyone under 18?
- Does your site use e-commerce?
- Is any data sent to a third-party service?
GDPR – Start By Taking These 4 Steps
Every website is different, so there isn’t a one-size-fits-all checklist for GDPR compliance. But there are some privacy best practices that every business and website owner should be doing now.
Step 1: Know Your Data
- What data are you collecting? Almost all websites collect visitors’ IP addresses. You might also be collecting email addresses for a newsletter, credit card numbers for payments, and many other types of personal data.
- How are you collecting that data? Whether passively (via Google Analytics) or actively (via a contact form), most sites collect data. The key is to not just know what data you’re collecting but also how you’re collecting it.
- Where does that data live? For websites, user data can live in the database, the site folder structure or within a third-party application. Every site is unique, so knowing exactly where that data is stored is vital.
- Where are you sending the data? Do you make marketing decisions based on data (think Google)? Do you send out a newsletter to subscribers (think MailChimp or HubSpot)? Do visitors buy your products (think PayPal, Stripe or USPS)? Then you are most likely using a third-party integration with your website—and you’re responsible for the data that gets sent to it.
Step 2: Have Excellent Security Practices
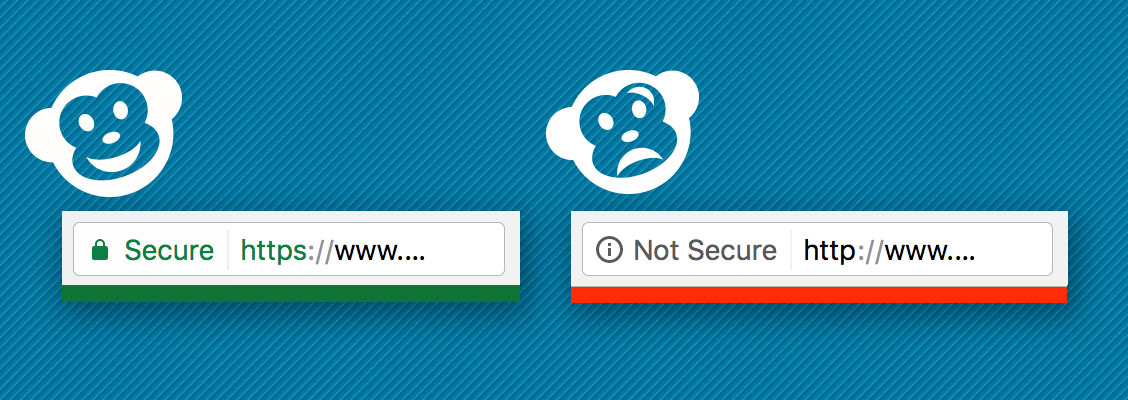
- Install an SSL certificate and convert your site to use HTTPS on all pages. Using an SSL (Secure Sockets Layer) certificate plus full HTTPS creates an encrypted connection between a website and a visitor’s browser. This helps to ensure that all data passed between the two remains private and secure.
Pro tip: If you’re unsure if your site complies, you can check by going to your site and confirming if your site URL begins with HTTPS.
- Use strong passwords. Strong passwords make it harder for your site (and other devices and accounts) to get hacked. Use complex, unique passwords and change them often.
Pro tip: The easiest—and most secure—approach to creating a new password is to string a few words together to create a long and visually memorable passphrase. For example, “monkeyswingingbananas” is easy to remember but is difficult to crack.
- Collect and store only the data you need. Make sure you know why you are storing a user’s data and only collect and store what you actually need.
- Review your site’s admin login. Make sure your website’s admin users are people who are still working at your company and have a reason to have that level of access. WordPress offers built-in user roles that can restrict access to only the site areas that a user needs.
- Keep your site updated. Running regular site backups and updates on your website, plugins and themes is extremely important, especially for security. These updates help patch vulnerabilities, keeping your site more secure.
Pro tip: If you don’t have the time or know-how to keep your site updated, let’s chat. We may have a maintenance plan that’s right for you.
Step 3: Write a Privacy Policy
As you’ve bounced from one website to another, you may have seen links to various privacy policies. Most of us have passed them by for a myriad of reasons: the links were hidden in the footer, we weren’t motivated to wade through the legalese, or the policy was MIA.
Under GDPR, you are not only required to provide a privacy policy, but you’re also expected to provide one in plain, easy-to-understand English (or your audience’s predominant language).
Your website’s privacy policy should answer all the questions under “Step 1: Know Your Data” and also include: (1) how long you plan to retain the data, and (2) how someone can contact you if they have questions or want to request their data from you. Be prepared to act when someone asks you to send them the data you’ve collected about them or asks you to remove it permanently from or anonymize it in your database.
Pro tip: WordPress just released some built-in GDPR tools that can help with creating a privacy policy for your website. Review and update the policy to ensure that it makes sense with your site’s configuration and data practices. It’s likely that you’ll need to make edits to your policy for it to be accurate.
Step 4: Set Up Opt-Ins
If you’re collecting any information about your users, then they need to explicitly opt in to allow you or a third party to store it. What this means is that you need to provide a checkbox for users to give their consent.
This checkbox also needs to provide a description of what that consent really is, which is:
- users understand that they are consenting to have their data transferred to you
- you will store that data
- you will use that data in particular ways
This checkbox can’t be automatically checked and the language needs to clearly explain how you will be using their data.
Pro tip: Do you have a newsletter signup on your site? Then consider this opt-in example: “By checking this box, [business name] has permission to store my name and email address and transfer it to [MailChimp or third party] for the purpose of sending me newsletters and special offers from the business.”
GDPR – Resources For Continuing Education
If this post has left you wanting more about GDPR, then you’re in luck. Below are additional articles and resources that run the gamut, from checklists to rants, from humorous to technical.
- Web Privacy And WordPress GDPR Compliance – The Definitive Guide by Martin Aranovitch for WPMU DEV
- The Ultimate Guide to WordPress and GDPR Compliance – Everything You Need to Know by WPBeginner
- 3 things to keep in mind before you design for GDPR by Amanda Yee for UX Collective
Image credits: Featured image: Pete Linforth from Pixabay; HTTPS image: CodeGeek